Astrophotography Under Dark Island Skies: Shooting the Milky Way on Hooper's Island
Stargazing is about lying back and looking up. Astrophotography is about catching it — turning a dark sky into an image you can keep. Hooper's Island, remote and low-lit at the edge of the Bay, has genuinely dark rural skies, which is the single biggest ingredient for both. If you've ever wanted to photograph the Milky Way arching over the water, this is a fine place to try it, and you don't need a mountain of gear to get a result you'll be proud of.
Why dark skies matter so much
Away from city glow, far more stars are visible — and a camera, which can gather light for seconds at a time, sees even more than your eye does. Hooper's Island is rural and quiet, without the dome of light pollution that washes out the sky over towns and cities. On a clear, moonless night here, the Milky Way can show up as a real band of texture across the sky. That's the raw material. Your job is mostly to hold a camera very still and let it drink the light in.
The simple gear list
You can go deep down this rabbit hole, but a beginner really needs only three things:
- A camera that allows manual settings. A DSLR or mirrorless camera is ideal, but many recent phones have a "night" or long-exposure mode that does a surprisingly good job — bring whatever you have.
- A sturdy tripod. This is non-negotiable. Star photos need multi-second exposures, and any handheld shake turns pinpoint stars into smears. If you don't own one, even a small tabletop tripod or a beanbag on the pergola rail helps.
- A wide, bright lens (if you have interchangeable lenses). A wide angle takes in more sky and land; a low f-number (like f/2.8 or lower) lets in more light. The kit lens most cameras ship with will still get you started.
Nice-to-haves: a remote shutter release or your camera's 2-second self-timer (so pressing the button doesn't shake the shot), spare batteries (cool nights drain them faster), and a red-light headlamp so you can see your dials without wrecking everyone's night vision.
Starter settings to dial in
Every camera differs, so treat these as a launch point and adjust by looking at your results on the screen:
- Manual mode. You want control of all three of the below.
- Aperture: as wide as your lens goes (the smallest f-number, e.g. f/2.8).
- Shutter: start around 15–20 seconds. Much longer than that and the stars begin to streak as the Earth turns — which you can lean into for star trails, or avoid for crisp points.
- ISO: start around 1600–3200 and adjust. Higher brightens the image but adds grain; find the balance you like.
- Focus: switch to manual focus and set it to (or just short of) infinity. Use live view to zoom in on a bright star and nudge focus until it's a sharp pinpoint. This is the step that makes or breaks a night shot.
- Format: shoot RAW if you can — it holds far more detail to bring out later.
Timing is everything
The sky won't cooperate every night, so stack the deck in your favor:
- Chase the new moon. A bright moon washes out the fainter stars and the Milky Way. The nights around a new moon are darkest and best; check a moon-phase app when you plan.
- Wait for it to get properly dark. True darkness comes a while after sunset. The later hours, once twilight is fully gone, are the deepest.
- Watch the season for the Milky Way core. The bright, dramatic center of the Milky Way is a warmer-months target and rides low in the southern sky. Summer nights here are a good window; a stargazing app will show you exactly where to point.
- Mind the meteor calendar. The Perseid shower peaks around mid-August, and long exposures can occasionally catch a streak — a lovely bonus.
A clear, dry night with low humidity gives the crispest stars. Cloud cover is the one thing you can't beat, so keep an eye on the forecast and be ready to seize a good night when it comes.
Get $100 toward your first booking
Create a free Bayside Rewards account and we'll drop $100 toward your first direct booking — sign in when you check out and the $100 comes off there. Then earn 8% back on every stay after that.
Composing your Chesapeake night shot
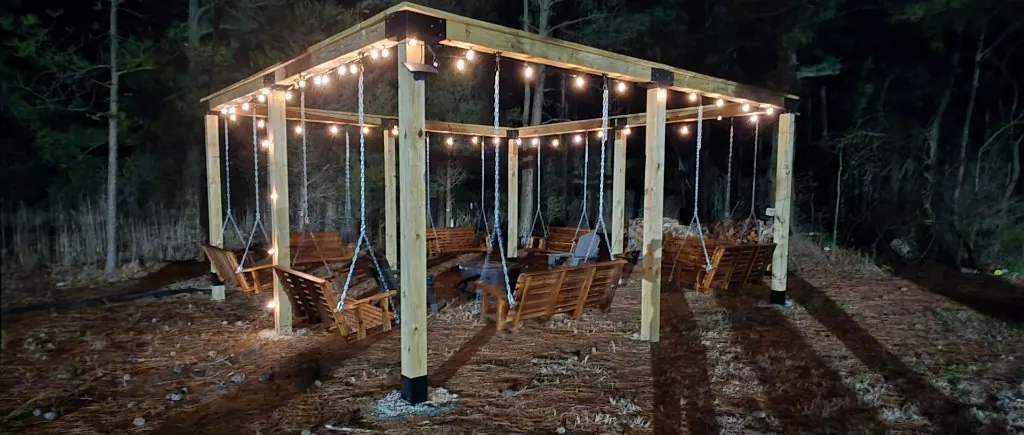
A sky full of stars is beautiful; a sky full of stars over something is a photograph. Give your frame an anchor in the landscape — the silhouette of the house, the lighted pergola glowing warm against the dark, a lone tree, or the horizon line of the marsh. That foreground gives the image a sense of place and scale, and quietly says "this was the Chesapeake." A faint bit of warm light on the pergola or a rocking chair can balance beautifully against the cool starlight.
One last comfort: dress warmer than you think, because standing still under a night sky gets cold even in summer, and bring a friend and a thermos. Some of the best frames come on the third or fourth try, long after you'd have quit alone. Then wander back to the fire pit, scroll through what you caught, and pick tomorrow night to try again.